The rich, creamy texture and tangy flavor of Greek yogurt have made it a staple in countless kitchens. While store-bought options are convenient, crafting your own Greek yogurt at home using a yogurt maker offers unparalleled freshness, ingredient control, and significant cost savings. With over a decade of experience in kitchen appliances, particularly yogurt makers, I’ve seen countless models and perfected techniques to achieve that luxurious, protein-packed result. Let’s delve into the world of homemade Greek yogurt and discover how to create your best batch yet.
Yogurt Makers: Your Gateway to Creamy Greek Yogurt
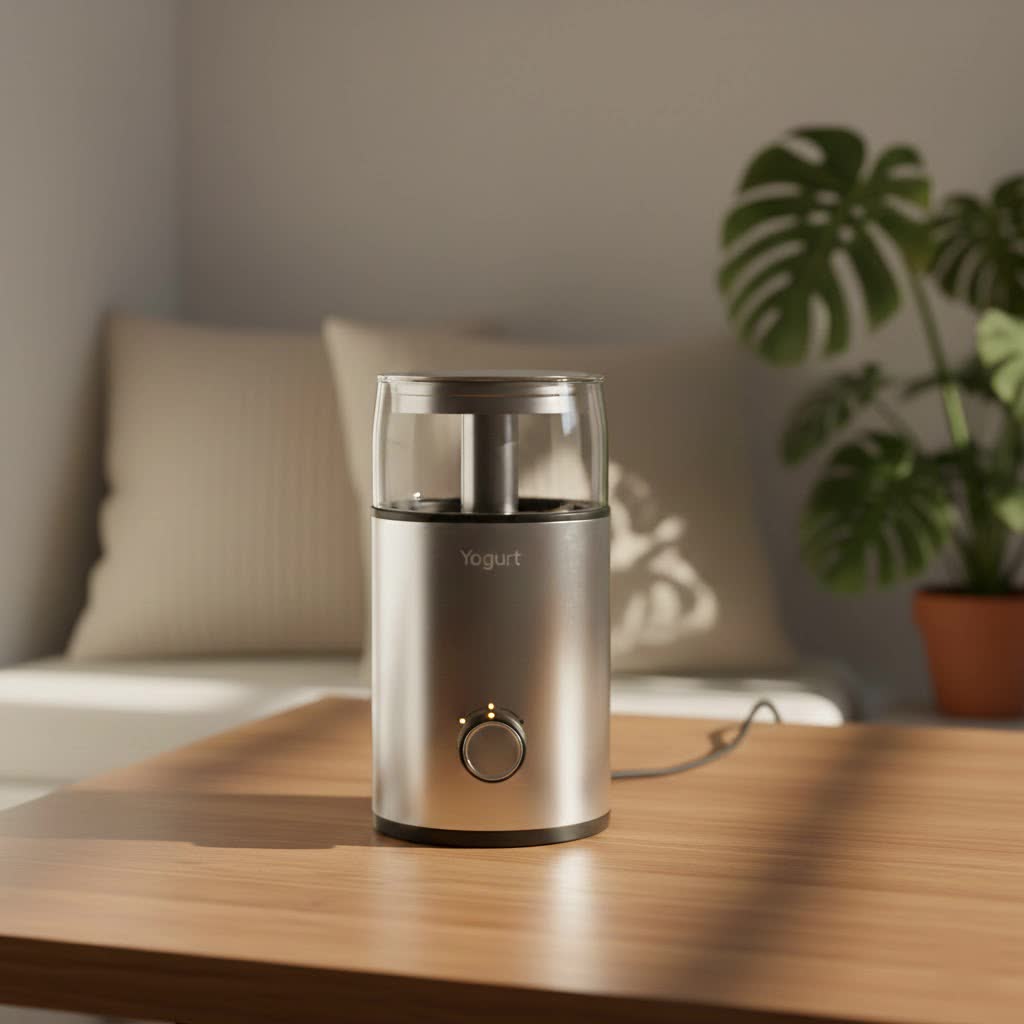
A yogurt maker is an essential tool for consistent, high-quality homemade yogurt. It provides the stable, warm environment necessary for beneficial bacteria to transform milk into yogurt. While making Greek yogurt involves an additional step of straining, the initial fermentation process is crucial, and a reliable yogurt maker makes it effortless.
What is a Yogurt Maker and Why Do You Need One for Greek Yogurt?
|
Our Picks for the Best Yogurt Maker in 2026
We may earn a commission when you use one of our links to make a purchase.
|
||
| Num | Product | Action |
|---|---|---|
| 1 | Yogurt Maker with Timer and Temperature Control, Fully Automatic for Home Use. Perfect for Making Greek Yogurt and Probiotic Yogurt, Equipped with an Automatic Shut-off Function |

|
| 2 | Yogurt Maker Machine with 3 Functions (Yogurt, Rice Wine & Natto), Adjustable Temperature & Time Control, 1.2L Capacity, Automatic Shut-Off & PTC Heating for Homemade Probiotic & Greek Yogurt |
|
| 3 | GDOR Yogurt Maker with Adjustable Temp & Timer– Probiotic-Rich – Digital Greek Yogurt Machine with 8×6oz BPA-Free Glass Jars, Easy to Use for Home, Stainless Steel |
|
| 4 | Euro Cuisine YM80 Electric Yogurt Maker Machine- Promote Gut Health with Probiotic Rich Homemade Yogurt -Home Yogurt Incubator with Glass Jars, White |
|
| 5 | Stainless Steel Yogurt Maker with 1 Quart Glass Jar and Complete Recipe Book to Make 12+ Easy Homemade Dairy Free and Milk Yogurts |
|
| 6 | 5L Black Garlic Fermenter, Yogurt Maker with Adjustable Temperature & Time Control,Garlics Maker Multi, Clove Garlic Cooker, Kimchi machine,Sweet Rice Wine Maker Full Automatic,Natto Makers |
|
| 7 | Suteck Yogurt Maker - Stainless Steel Yogurt Makers with Adjustable Time & Temp Control,Automatic Shut-Off & Constant Temper for Homemade Greek, Probiotic Yogurt, BPA-Free 8 Glass Jars (48 oz), Black |
|
| 8 | Suteck Yogurt Maker - Stainless Steel Yogurt Makers with Adjustable Time & Temp Control,Automatic Shut-Off & Constant Temper for Homemade Greek, Probiotic Yogurt, BPA-Free 2 Yogurt Bowls (2 Quart) |
|
| 9 | Yogurt Maker with Adjustable Temperature & 48H Timer - 6 Glass Jars for Homemade Probiotic Yogurt, for Family Wellness & Healthy Diet Lovers |
|
| 10 | Yogurt Maker with Two Containers, Yogurt Maker Machine with Adjustable Temperature & Time Control, Automatic Shut-Off & Constant Temper for Homemade Probiotic Yogurt, Promoting Gut Health |
|
A yogurt maker is an appliance designed to maintain a precise and consistent temperature, typically between 105°F and 115°F (40°C to 46°C), which is ideal for the live active cultures in your yogurt starter to ferment milk. This controlled environment is key to culturing yogurt effectively.
The benefits of making your own yogurt, especially Greek yogurt, are numerous. Firstly, it’s highly cost-effective. Greek yogurt, due to its straining process requiring more milk, is significantly more expensive than regular yogurt in stores. Producing it at home can lead to substantial savings over time. Secondly, you gain complete control over ingredients. You can choose your preferred type of milk (whole, 2%, organic) and ensure no artificial additives, sweeteners, or thickeners are included. This makes for a healthier, purer product tailored to your dietary needs. Homemade Greek yogurt also boasts a uniquely fresh and vibrant flavor that often surpasses commercial varieties.
Compared to store-bought options, homemade Greek yogurt offers superior freshness and customizable texture. You can control the tanginess by adjusting fermentation time and the thickness by modifying straining duration, something impossible with pre-packaged yogurts.
Popular Types of Yogurt Makers for Your Greek Yogurt Journey
Yogurt makers come in various designs, each with its own advantages for crafting the perfect batch of yogurt before straining it into Greek yogurt.
- Basic Manual Yogurt Makers: These are often the most budget-friendly options.
- Pros: Simple to operate, often requiring just hot water or a basic heating element to maintain temperature. They are typically compact and easy to store.
- Cons: May offer less precise temperature control, potentially leading to varied results. Fermentation times might need more manual monitoring.
- Electronic Digital Yogurt Makers: These offer enhanced control and convenience.
- Pros: Provide precise temperature settings and often include timers with automatic shut-off features. This ensures optimal fermentation conditions, leading to consistent yogurt texture and flavor. They are typically “set and forget” machines.
- Cons: Generally higher in price than manual models and can be more complex to program initially.
- Mini Yogurt Makers: Ideal for small households or individual portions.
- Pros: Extremely compact, space-saving, and perfect for single servings or small batches, reducing waste.
- Cons: Limited in capacity, making them less suitable for large families or those who consume a lot of yogurt.
- Multi-functional Appliances (e.g., Instant Pots with Yogurt Function): These versatile kitchen gadgets often include a dedicated yogurt setting.
- Pros: Offers multiple cooking functions in one appliance, saving counter space. The “yogurt” setting precisely heats and incubates milk. With an Instant Pot, the entire heating and incubating process can often be done in the same pot, simplifying cleanup.
- Cons: The yogurt function may not be as optimized as a dedicated yogurt maker for nuanced control. Some models might not accommodate multiple small jars.
Comparing Yogurt Maker Types
| Feature | Basic Manual | Electronic Digital | Mini Yogurt Maker | Multi-functional (Instant Pot) |
|---|---|---|---|---|
| Price | Low | Medium to High | Low to Medium | Medium to High |
| Capacity | Varies, often medium | Varies, often large batches | Small (single servings) | Medium to Large |
| Temp Control | Less precise, manual | Very precise, automatic | Less precise | Precise, automatic |
| Timer | No (manual monitoring) | Yes (automatic shut-off) | No (manual monitoring) | Yes (automatic shut-off) |
| Ease of Use | Simple, but more hands-on | Set-and-forget | Simple | Can be complex for new users |
| Versatility | Yogurt only | Yogurt only | Yogurt only | Multiple cooking functions |
| Best For | Beginners, budget-conscious | Regular users, consistent results | Individuals, small portions | Versatility, space-saving |
Top Yogurt Makers and Greek Yogurt Strainers (General Recommendations)
While dedicated yogurt makers primarily handle the fermentation, transforming regular yogurt into Greek yogurt requires a good strainer. Many users find a two-step approach most effective: using a standard yogurt maker for incubation, then a separate strainer for whey removal.
- Euro Cuisine Automatic Digital Yogurt Maker: Often recommended for its ease of use and ability to make multiple flavors. This is a great choice for the initial yogurt fermentation.
- Hatrigo 2 Quart Inner Capacity Greek Yogurt Maker / Euro Cuisine Greek Yogurt Maker: These are not “makers” in the fermentation sense, but excellent dedicated strainers. They feature fine mesh (often stainless steel) designed to efficiently separate whey from yogurt, yielding thick Greek yogurt. Their design (e.g., rectangular shape for storage) and durability are often highlighted.
- Lakeland Multi Yogurt Maker: Praised as an “all-rounder” that can handle both regular and Greek yogurt making (implying it’s good for incubation, and then you’d strain the result).
When considering a yogurt maker, prioritize models that offer stable temperature control, as this is the most critical factor for successful fermentation. For Greek yogurt, a high-quality, fine-mesh strainer is equally important.
Your Guide to Selecting the Right Yogurt Maker
Choosing the ideal yogurt maker involves weighing your specific needs against the available features.
Determine Your Yogurt-Making Needs
- Who are you making yogurt for? For a single person or small portions, a mini yogurt maker or smaller capacity model might suffice. For a family or high consumption, a larger batch maker (1.5-2 quarts or more) is essential.
- What type of yogurt do you want to make? For traditional and Greek yogurt, almost any yogurt maker works for the initial fermentation. If you plan to experiment with other fermented foods or desire extreme precision, a multi-functional device or an advanced digital yogurt maker might be better.
- What is your budget? Prices vary widely. Basic models are inexpensive, while feature-rich digital or multi-functional units cost more. Remember to factor in the cost of a good Greek yogurt strainer if your chosen yogurt maker doesn’t include one.
Key Criteria for Your Purchase
- Capacity: Match the yogurt maker’s volume to your consumption. Consider models that make a large single batch or multiple individual servings.
- Power/Heating: Look for consistent and reliable heating to maintain the optimal fermentation temperature.
- Material: Glass jars are preferred by many for hygiene and avoiding plastic, though BPA-free plastic containers are also common.
- Features:
- Temperature Control: Digital settings allow for precise adjustments (e.g., 105-115°F), which is crucial for consistency.
- Timer with Auto Shut-off: Prevents over-fermentation, which can lead to overly sour or grainy yogurt.
- Cooling Function: Some advanced models automatically cool the yogurt after incubation, eliminating the need for immediate transfer to the fridge.
- Included Jars/Containers: Assess if the included containers suit your needs.
- Brand & Price: Research reputable brands known for durability and good customer service. Compare prices across various retailers.
- Reviews: Always read user reviews to gauge real-world performance, reliability, and ease of use. Pay attention to comments regarding temperature consistency and ease of cleaning.
Crafting Delicious Greek Yogurt: A Step-by-Step Guide
Making Greek yogurt in a yogurt maker is a simple yet rewarding process. The key is careful attention to temperature and quality ingredients.
1. Gather Your Ingredients and Equipment
- Ingredients:
- Milk: 1 gallon (approximately 3.8 liters) of whole or 2% pasteurized dairy milk. Avoid ultra-pasteurized (UHT) milk, as its proteins are too denatured for good yogurt setting. Whole milk yields creamier results.
- Starter Culture: 2-4 tablespoons of plain yogurt with live active cultures (ensure it contains bacteria like L. bulgaricus and S. thermophilus) or a packet of powdered yogurt starter culture. Using fresh plain yogurt as a starter is generally more effective than Greek yogurt, as Greek yogurt has had some active cultures strained out with the whey.
- (Optional) Sugar or other flavorings to add after fermentation.
- Equipment:
- Yogurt maker
- Large stainless steel pot
- Food thermometer (digital instant-read is best)
- Whisk
- Clean containers/jars for the yogurt maker
- For Straining (Greek Yogurt): Fine-mesh strainer, cheesecloth, nut milk bag, or a dedicated Greek yogurt strainer.
- Large bowl (to collect whey during straining)
2. Prepare the Milk
- Heat the Milk: Pour the milk into the stainless steel pot. Slowly heat the milk over medium heat, stirring occasionally, until it reaches 180°F (82°C). This step kills any unwanted bacteria and denatures milk proteins, leading to a thicker yogurt. Use your food thermometer to ensure accuracy.
- Cool the Milk: Remove the pot from the heat. Allow the milk to cool down to between 105°F and 115°F (40°C to 46°C). This is the ideal temperature for the starter cultures. You can speed up cooling by placing the pot in an ice bath, stirring frequently. Once cooled, skim any “skin” that forms on top for a smoother yogurt.
3. Inoculate the Milk
- Temper the Starter: In a small bowl, whisk your starter yogurt or dissolve the powdered culture with about ½ cup of the warm milk. This “tempers” the starter, bringing it to a similar temperature and preventing it from clumping when added to the larger batch.
- Combine: Gently stir the tempered starter mixture into the rest of the cooled milk in the pot. Mix thoroughly but avoid over-whisking, which can introduce air and affect consistency.
4. Incubate in Your Yogurt Maker
- Transfer: Pour the inoculated milk into the clean containers or a single large container provided with your yogurt maker.
- Incubate: Place the containers into your yogurt maker, cover it, and set the temperature (if adjustable) to 105-115°F (40-46°C). Set the timer for 6-8 hours. Longer incubation (up to 12 hours) will result in a tangier, firmer yogurt. Check after 5-6 hours by gently tilting a jar; if it moves in one mass and pulls away from the side, it’s set.
- Cool Down: Once incubation is complete, turn off the yogurt maker. Allow the yogurt to cool slowly at room temperature for about 1-2 hours before transferring it to the refrigerator. Rapid temperature changes can make yogurt runny. Refrigerate for at least 4-6 hours to allow it to fully set.
5. Strain for Greek Yogurt (The Crucial Step!)
- Set Up Straining: Place your fine-mesh strainer (lined with cheesecloth or a coffee filter if using a standard colander) or dedicated Greek yogurt strainer over a large bowl to collect the whey.
- Pour Yogurt: Gently spoon your chilled, set yogurt into the prepared strainer.
- Refrigerate and Strain: Cover the strainer (or the entire setup) and place it in the refrigerator. Allow it to strain for at least 2-4 hours for a slightly thicker yogurt, or 6-12 hours (even overnight) for very thick, dense Greek yogurt. The longer you strain, the thicker and more concentrated your Greek yogurt will become.
- Enjoy: Once your Greek yogurt reaches the desired consistency, transfer it to an airtight container and store it in the refrigerator. Don’t discard the collected whey; it’s nutrient-rich and can be used in smoothies, baking, or even as plant fertilizer.
Expert Tips for Perfect Homemade Greek Yogurt
Even with a reliable yogurt maker, a few tricks can elevate your homemade Greek yogurt from good to extraordinary.
- Choose High-Quality Milk: Whole milk generally produces the creamiest, most robust Greek yogurt. The fat content contributes to a richer texture. While 2% milk works well, skim milk can result in a thinner final product unless thickeners are added.
- Fresh and Active Starter: The viability of your starter culture is paramount. Always use plain yogurt with “live active cultures” and check its expiration date. If using a previous batch of homemade yogurt, ensure it’s less than a week old for maximum potency.
- Precise Temperature Control: This cannot be overstated. Both heating the milk to 180°F (to kill competing bacteria and denature proteins) and cooling it to 105-115°F (for optimal bacterial growth) are critical. A good thermometer is your best friend here.
- Don’t Disturb During Incubation: Avoid moving or opening the yogurt maker during the fermentation process. Disrupting the cultures can lead to a runny or unevenly set yogurt.
- Experiment with Straining Times: The beauty of homemade Greek yogurt is customizing its thickness. Strain for a shorter period for a slightly softer, creamier texture, or longer for a very dense, almost cheese-like consistency (like Labneh).
Troubleshooting Common Greek Yogurt Issues
Even experienced makers can encounter hiccups. Here are solutions to common problems:
- Runny Yogurt:
- Cause: Insufficient incubation time, incorrect temperature (too low or too high), old or inactive starter culture, or ultra-pasteurized milk.
- Fix: Increase incubation time, ensure correct temperatures with a reliable thermometer, use a fresh starter, or switch to standard pasteurized milk. Sometimes, adding a small amount of dry milk powder to the milk before heating can also help thicken it.
- Overly Sour Yogurt:
- Cause: Incubated for too long.
- Fix: Reduce incubation time for future batches. For the current batch, you can try to neutralize some sourness by mixing in a pinch of baking soda (very carefully, as it will fizz) or simply enjoy it with sweet mix-ins.
- Whey Separation (not during straining):
- Cause: Over-fermentation or uneven temperature.
- Fix: Adjust incubation time and ensure your yogurt maker maintains a stable temperature. This is also why cooling slowly and refrigerating promptly after incubation is important. Small amounts of whey separation are normal.
Cleaning and Maintaining Your Yogurt Maker
Proper care ensures the longevity and hygiene of your appliance.
- Clean After Each Use: Wash all removable parts (jars, lids, main container) with warm, soapy water immediately after use to prevent yogurt residue from drying and becoming difficult to remove. Most glass jars are dishwasher safe.
- Wipe Down Unit: For the main heating unit, wipe it clean with a damp cloth. Never submerge the electrical base in water.
- Storage: Store your yogurt maker in a dry, cool place away from direct sunlight. Ensure all parts are completely dry before storing to prevent mold or odors.
Where to Buy a Reliable Yogurt Maker
You can find yogurt makers at various retailers:
- Large Electronics Stores / Home Goods Stores: Many major retailers carry a selection of yogurt makers from different brands.
- Online Marketplaces: Websites like Amazon, Target, Walmart, and specialty kitchen appliance sites offer a wide array of options with competitive pricing and customer reviews.
- Specialty Fermentation Stores: Stores like Cultures for Health (as seen in our research) often stock dedicated yogurt makers and Greek yogurt strainers, along with starter cultures and other fermentation supplies.
When purchasing, always prioritize models from reputable brands and check the warranty information.
Important Considerations for Using Your Yogurt Maker
To ensure safety and optimal results:
- Read the Manual: Always thoroughly read your specific yogurt maker’s instruction manual before its first use. Different models may have unique features or operating procedures.
- Inspect for Damage: Before each use, quickly check the power cord and the unit for any signs of damage. Do not use a damaged appliance.
- Keep Out of Reach of Children: Yogurt makers operate with heat and electricity; keep them away from children and pets.
- Avoid Cross-Contamination: Use clean utensils and containers to prevent introducing unwanted bacteria that could spoil your yogurt batch.
“The magic of homemade Greek yogurt lies in two simple steps: precise fermentation followed by patient straining. A good yogurt maker handles the first, and a quality strainer perfects the second.” – ReviewMyCRM.com Expert Team
Conclusion
Embracing the world of homemade Greek yogurt with your yogurt maker is a rewarding journey, offering a healthier, more economical, and supremely fresh alternative to store-bought options. By understanding the simple science of fermentation, choosing the right equipment, and following a few key steps, you can consistently produce luscious, protein-rich Greek yogurt tailored precisely to your taste and texture preferences. The small investment in a yogurt maker and strainer, combined with your newfound expertise, will undoubtedly transform your kitchen into a haven of wholesome, delicious dairy creations.
Are you ready to elevate your culinary game and discover the unparalleled satisfaction of truly homemade Greek yogurt?
Frequently Asked Questions
Can I use store-bought Greek yogurt as a starter for my next batch?
While technically possible, it’s generally recommended to use plain, unstrained yogurt with live active cultures as a starter. Greek yogurt has been strained, which removes some of the whey that contains active bacteria, potentially making it less potent for culturing a new batch. If you do use it, ensure it’s fresh and explicitly states “live active cultures” on the label.
What should I do with the leftover whey from straining Greek yogurt?
Don’t discard it! Whey is rich in protein and nutrients. You can use it in smoothies, as a liquid base for baking bread or pancakes, to fertilize plants, or even in savory applications like marinades and soups.
How long does homemade Greek yogurt last in the refrigerator?
Homemade Greek yogurt, when stored in an airtight container in the refrigerator, typically lasts for about 1 to 2 weeks. Its freshness and shelf life can vary depending on hygiene during preparation and storage conditions.
Can I make Greek yogurt with non-dairy milk in a yogurt maker?
Yes, you can make non-dairy yogurt with plant-based milks like almond, soy, or coconut milk in a yogurt maker. However, the process often requires different starter cultures and sometimes thickeners (like agar-agar or tapioca starch) to achieve a similar consistency, as plant-based milks have different protein structures than dairy milk. The straining step for “Greek-style” non-dairy yogurt would still apply.
Why is my homemade Greek yogurt too sour?
Your yogurt is likely too sour because it was incubated for too long. The longer the yogurt ferments, the more lactic acid the bacteria produce, resulting in a tangier flavor. For a milder yogurt, reduce the incubation time in your yogurt maker for future batches.