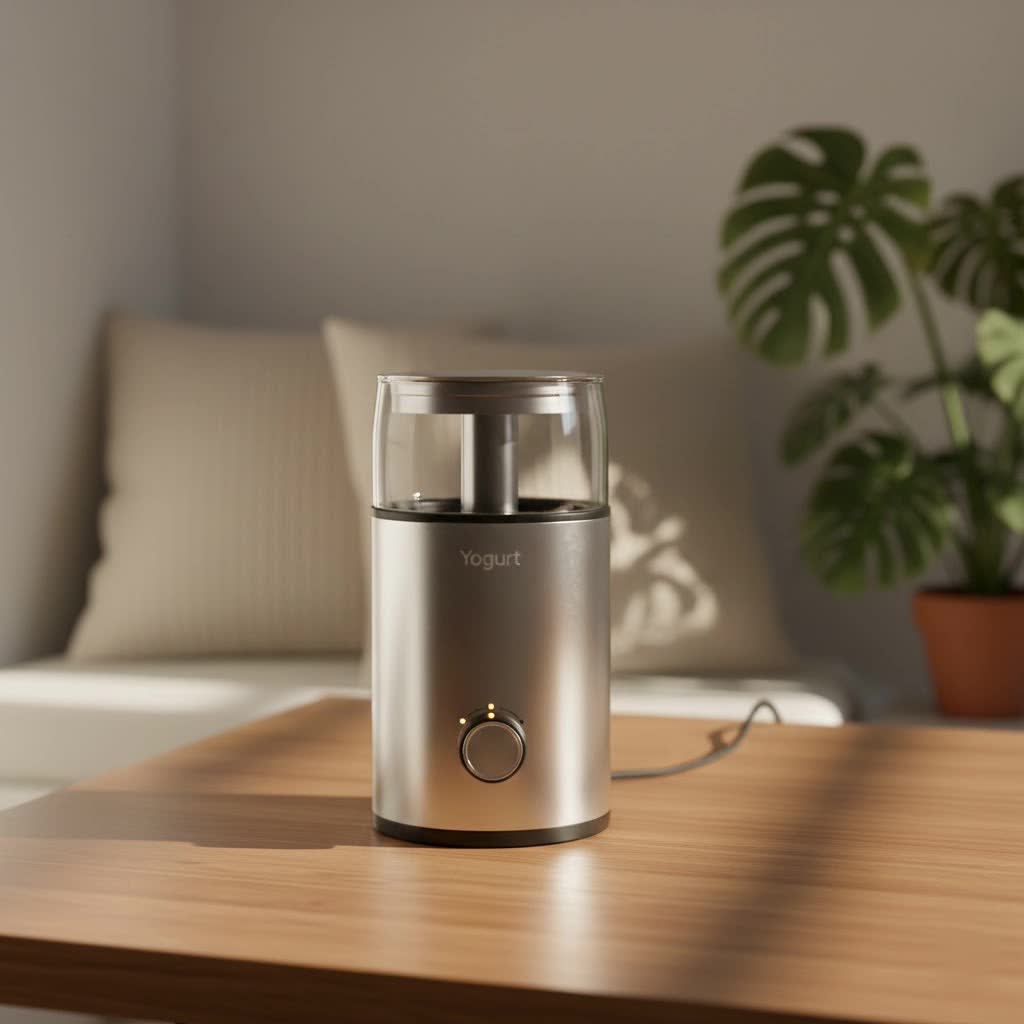
Have you ever considered taking control of your daily dose of probiotics and creamy indulgence? With the Best Rated Yogurt Maker, you can transform simple ingredients into fresh, wholesome yogurt right in your kitchen, offering a healthier, more economical, and entirely customizable alternative to store-bought options. This comprehensive guide will navigate the world of yogurt makers, helping you discover the perfect appliance to suit your lifestyle and culinary aspirations.
Yogurt Makers: Everything You Need to Know From A to Z
Embracing homemade yogurt is a rewarding journey, opening doors to healthier eating and endless flavor possibilities. Let’s explore why a yogurt maker is an essential addition to your kitchen and what makes these appliances so effective.
What is a Yogurt Maker? Why Do You Need One?
|
Our Picks for the Best Yogurt Maker in 2026
We may earn a commission when you use one of our links to make a purchase.
|
||
| Num | Product | Action |
|---|---|---|
| 1 | Yogurt Maker Machine with 3 Functions (Yogurt, Rice Wine & Natto), Adjustable Temperature & Time Control, 1.2L Capacity, Automatic Shut-Off & PTC Heating for Homemade Probiotic & Greek Yogurt |

|
| 2 | Yogurt Maker with Two Containers, Yogurt Maker Machine with Adjustable Temperature & Time Control, Automatic Shut-Off & Constant Temper for Homemade Probiotic Yogurt, Promoting Gut Health |
|
| 3 | Suteck Yogurt Maker - Stainless Steel Yogurt Makers with Adjustable Time & Temp Control,Automatic Shut-Off & Constant Temper for Homemade Greek, Probiotic Yogurt, BPA-Free 8 Glass Jars (48 oz), Black |
|
| 4 | Stainless Steel Yogurt Maker with 1 Quart Glass Jar and Complete Recipe Book to Make 12+ Easy Homemade Dairy Free and Milk Yogurts |
|
| 5 | GDOR Yogurt Maker with Adjustable Temp & Timer– Probiotic-Rich – Digital Greek Yogurt Machine with 8×6oz BPA-Free Glass Jars, Easy to Use for Home, Stainless Steel |
|
| 6 | 5L Black Garlic Fermenter, Yogurt Maker with Adjustable Temperature & Time Control,Garlics Maker Multi, Clove Garlic Cooker, Kimchi machine,Sweet Rice Wine Maker Full Automatic,Natto Makers |
|
| 7 | Euro Cuisine YM80 Electric Yogurt Maker Machine- Promote Gut Health with Probiotic Rich Homemade Yogurt -Home Yogurt Incubator with Glass Jars, White |
|
| 8 | Yogurt Maker with Timer and Temperature Control, Fully Automatic for Home Use. Perfect for Making Greek Yogurt and Probiotic Yogurt, Equipped with an Automatic Shut-off Function |
|
| 9 | Suteck Yogurt Maker - Stainless Steel Yogurt Makers with Adjustable Time & Temp Control,Automatic Shut-Off & Constant Temper for Homemade Greek, Probiotic Yogurt, BPA-Free 2 Yogurt Bowls (2 Quart) |
|
| 10 | Yogurt Maker with Adjustable Temperature & 48H Timer - 6 Glass Jars for Homemade Probiotic Yogurt, for Family Wellness & Healthy Diet Lovers |
|
A yogurt maker is a kitchen appliance designed to maintain a consistent, warm temperature, creating the ideal environment for milk to ferment and transform into yogurt. This process, typically taking between 6 to 12 hours, allows beneficial bacteria (starter cultures) to thrive, converting lactose into lactic acid, which thickens the milk and gives yogurt its characteristic tangy flavor and creamy texture.
The benefits of making your own yogurt at home are numerous. Firstly, it’s significantly more cost-effective than repeatedly purchasing commercial yogurt. You gain complete control over the ingredients, ensuring no unwanted sugars, artificial flavors, or preservatives are added. This means a healthier product, often with a higher concentration of live probiotics than many store-bought varieties, promoting improved digestion and enhanced immune function. Beyond health and savings, homemade yogurt offers unparalleled versatility, allowing you to experiment with various milks, flavors, and consistencies to match your exact preferences, from traditional plain to rich Greek-style or even plant-based alternatives.
Popular Types of Yogurt Makers Today
Yogurt makers come in several forms, each catering to different needs and preferences. Understanding their distinctions is key to choosing your ideal device.
- Manual (Non-Electric) Yogurt Makers:
- Pros: Generally inexpensive and straightforward to use. They rely on insulation to maintain heat, making them energy-efficient.
- Cons: Offer less precise temperature control, which can lead to inconsistencies in fermentation time and yogurt texture. They often require pre-heating milk to a specific temperature before transferring it to the maker.
- Electric Yogurt Makers:
- Pros: These are the most common type, featuring a heating element that precisely maintains the optimal fermentation temperature, usually between 90 to 120 degrees Fahrenheit. Many models come with convenient features like digital timers and automatic shut-off functions, ensuring consistent results without constant monitoring. They can produce yogurt in individual jars or a single large batch.
- Cons: Typically more expensive than manual versions and require an electrical outlet.
- Mini Yogurt Makers:
- Pros: Compact and ideal for individuals or small households with limited counter space. They are convenient for single servings or small batches.
- Cons: Limited in capacity, making them less suitable for larger families or those who consume a lot of yogurt.
- Multi-functional Appliances with Yogurt Settings:
- Pros: Devices like some Instant Pot models offer a yogurt function alongside various other cooking capabilities (pressure cooking, slow cooking, steaming). This versatility can save counter space by consolidating multiple appliances.
- Cons: While versatile, their primary function might not be yogurt making, and some users prefer dedicated machines for specialized results. They can also be pricier than standalone yogurt makers.
Comparison Table of Popular Yogurt Maker Types
| Feature | Manual Yogurt Maker | Electric Yogurt Maker | Mini Yogurt Maker | Multi-functional Appliance (with yogurt setting) |
|---|---|---|---|---|
| Price Range | Low | Medium to High | Low to Medium | High |
| Capacity | Varies, often moderate | Varies (individual jars to large) | Small (single servings) | Varies, often large |
| Temperature Control | Less precise, insulation-based | Precise, often digital & automatic | Typically precise, automatic | Precise, integrated into multi-cooker |
| Timer/Auto-Shutoff | No | Common | Common | Common |
| Ease of Use | Simple, but requires more initial prep | Very easy, often set-and-forget | Very easy | Can be more complex due to multiple functions |
| Versatility | Basic yogurt making | Various yogurt types, flavors | Basic yogurt making | Yogurt plus many other cooking functions |
Top 5 Best Rated Yogurt Makers of 2024
Based on performance, features, and user satisfaction, here are some of the best-rated yogurt makers currently on the market:
- Euro Cuisine Automatic Digital Yogurt Maker (YMX650): Often praised as a top performer, this electric model consistently produces quality yogurt in individual, dishwasher-safe jars. It’s known for its ease of use and automatic digital controls, though some models may have variations in timer functionality.
- Pros: Consistent results, convenient individual servings, easy to clean jars, digital display.
- Cons: Some users report minor issues with timer accuracy on older models.
- Euro Cuisine Electric Yogurt Maker (YM80): A more budget-friendly option from Euro Cuisine, the YM80 is excellent for basic yogurt with consistent results. It also makes individual jars, making it easy to portion and flavor.
- Pros: Great value, simple operation, individual jars for variety.
- Cons: Lacks an automatic shut-off or precise timer, requiring manual monitoring to prevent overly tart yogurt.
- Ultimate Probiotic Yogurt Maker: This versatile machine is highly regarded for its large capacity and ability to make various types of fermented foods. It often allows for precise temperature control, which is crucial for different cultures.
- Pros: Large capacity, good for families, precise temperature control, often multi-functional for other ferments.
- Cons: Can be pricier than basic models.
- Hatrigo 2 Quart Inner Capacity Greek Yogurt Maker / Euro Cuisine Greek Yogurt Maker: While not an electric maker, these are essential for Greek yogurt enthusiasts. They are strainers designed to separate whey from regular yogurt, resulting in a thicker, creamier product.
- Pros: Specifically designed for Greek yogurt, simple to use, easy to clean.
- Cons: Requires a batch of regular yogurt first (not a maker itself).
- Gouria Auto Yogurt Maker: Ideal for those with a high yogurt consumption, this model is celebrated for its large capacity, often accommodating 12 single-serving jars at once. It’s user-friendly and reliable for producing substantial quantities.
- Pros: Very large capacity, simple operation, great for diverse flavors in one batch.
- Cons: May take up more counter space.
How to Choose the Right Yogurt Maker for You
Selecting the perfect yogurt maker involves a few key considerations tailored to your specific needs and preferences.
- Determine Your Usage Needs:
- Who are you making yogurt for? A single person might prefer a mini maker, while a large family would benefit from a high-capacity model with multiple jars.
- What kind of yogurt do you want to make? Most electric makers can handle traditional dairy yogurt. If Greek yogurt is your preference, consider a maker that accommodates straining or a dedicated Greek yogurt strainer. Plant-based yogurts may require specific temperature ranges, so check machine specifications.
- What is your budget? Prices range from under $30 for basic models to over $70 for advanced or multi-functional machines.
- Important Criteria:
- Capacity: Decide if you need individual servings (5-7 oz jars) for convenience and flavor variety, or a single large batch container (up to 60 oz or more) for bulk preparation.
- Power/Features: Electric models offer consistent heat. Look for digital controls, timers, and automatic shut-off for hands-free operation and precise fermentation.
- Material: Glass jars are popular for individual servings and easy cleaning. Ensure any plastic components are BPA-free. Stainless steel interiors are durable and easy to maintain.
- Ease of Cleaning: Dishwasher-safe components significantly simplify cleanup.
- Brand and Price: Research reputable brands known for durability and good customer service. Compare prices across different retailers to find the best deal.
- Read Reviews and Compare Prices: Always check user reviews for real-world insights into performance and potential drawbacks. Compare prices from various online and brick-and-mortar stores to ensure you’re getting competitive pricing and a good warranty.
Detailed Guide on How to Use a Yogurt Maker
Making yogurt with a dedicated machine is a straightforward process that yields delicious results.
- Prepare Ingredients: You’ll primarily need milk (dairy or plant-based) and a yogurt starter (either a packet of commercial starter culture or a few tablespoons of plain, unflavored yogurt with live active cultures).
- Sanitize Equipment: Thoroughly wash your yogurt maker’s containers, lids, and any utensils that will come into contact with the milk and starter. Sterilization is crucial to prevent undesirable bacteria from interfering with your yogurt.
- Heat the Milk (Optional but Recommended): Heat your milk to about 180°F (82°C) on the stovetop. This step helps denature milk proteins, leading to a thicker yogurt, and kills off any unwanted microorganisms. Let the milk cool down to between 105-115°F (40-46°C) before adding the starter.
- Mix in the Starter: Once the milk has cooled to the ideal temperature, gently whisk in your yogurt starter. Ensure it’s fully dissolved and evenly distributed.
- Incubate the Yogurt: Pour the milk mixture into your yogurt maker’s containers, cover them (if individual jars), and place them in the machine. Set the timer according to your machine’s instructions or desired tartness (typically 6-12 hours). Turn on the yogurt maker.
- Cool and Store: Once the fermentation cycle is complete, turn off the machine and carefully remove the yogurt. Allow it to cool at room temperature for a short while before refrigerating it. The yogurt will continue to thicken as it chills.
- Enjoy: Once thoroughly chilled, your homemade yogurt is ready to be enjoyed plain or with your favorite toppings!
Tips for Making Delicious Homemade Yogurt
Achieving consistently delicious homemade yogurt is easier with a few expert tips.
- Choose Quality Milk: Higher fat milk (whole milk) generally yields a creamier, milder yogurt. Skim or low-fat milk can produce a runnier consistency. Organic milk can also affect the flavor and texture.
- Use Fresh Starter: Ensure your starter culture (either a store-bought packet or a spoonful of existing yogurt) is fresh and contains live active cultures. The fresher the starter, the more robust your fermentation will be.
- Control Temperature Precisely: Maintaining the optimal temperature (around 110°F/43°C) is critical. Too hot, and the cultures will die; too cool, and they won’t activate. Digital electric yogurt makers excel here.
- Experiment with Fermentation Time: Longer fermentation times result in a tangier, thicker yogurt. Experiment to find your preferred balance.
- Add Flavorings After Fermentation: Stir in fruits, honey, vanilla extract, or other flavorings after the yogurt has finished fermenting and cooled. Adding them beforehand can interfere with the bacterial cultures.
Common Yogurt Making Mistakes and How to Fix Them
Even experienced yogurt makers can encounter hiccups. Here are some common issues and their solutions:
- Thin/Runny Yogurt:
- Cause: Milk wasn’t heated enough initially, or the fermentation temperature was too low or inconsistent. Too short a fermentation time.
- Fix: Ensure milk reaches 180°F (82°C) and cools correctly. Verify your yogurt maker maintains a stable temperature. Extend fermentation time if needed. Adding a tablespoon of powdered milk can also help thicken it.
- Overly Sour Yogurt:
- Cause: Fermented for too long, or the temperature was too high.
- Fix: Reduce fermentation time in future batches. If your machine has adjustable temperature, lower it slightly. You can try blending a small amount of honey or maple syrup into overly sour yogurt to balance the taste.
- Watery/Separated Yogurt (Whey Separation):
- Cause: Normal whey separation can occur, especially with longer fermentation or lower fat milk. Extreme separation can be due to temperature fluctuations or an imbalance in starter cultures.
- Fix: Gently stir the whey back into the yogurt. For Greek yogurt, you’d intentionally strain the whey. Ensure stable fermentation temperature.
Proper Cleaning and Maintenance of Your Yogurt Maker
To ensure the longevity and hygiene of your yogurt maker, follow these simple cleaning and storage tips.
- Clean After Each Use: Immediately after enjoying your homemade yogurt, wash all removable parts (jars, lids, mixing containers) with warm, soapy water. Many jars and lids are dishwasher-safe, check your model’s instructions.
- Wipe Down the Base: Use a damp cloth to wipe the exterior and heating base of the yogurt maker. Avoid submerging the electrical base in water.
- Store Properly: Ensure all components are completely dry before reassembling or storing. Keep your yogurt maker in a dry, cool place away from direct sunlight.
Where to Buy a Reliable Yogurt Maker?
Finding a trustworthy retailer for your yogurt maker is just as important as choosing the right model.
- Major Appliance Stores: Large electronics and home appliance retailers often carry a selection of popular yogurt maker brands. You can compare models in person and often get assistance from sales associates.
- Online Marketplaces: Websites like Amazon, eBay, and dedicated kitchenware e-commerce sites offer a vast selection, competitive pricing, and user reviews. Be sure to check seller ratings and return policies.
- Specialty Kitchen Stores: Stores focusing on kitchen gadgets and small appliances may offer unique or higher-end models, along with knowledgeable staff.
Important Considerations When Using a Yogurt Maker
To ensure safety and optimal performance, keep these points in mind:
- Read the Manual: Always thoroughly read the instruction manual that comes with your yogurt maker before its first use. This will provide specific details on operation, cleaning, and safety for your particular model.
- Avoid Damaged Units: Never use a yogurt maker if it appears damaged, has frayed cords, or shows any signs of electrical malfunction.
- Keep Out of Reach of Children: Like all kitchen appliances, keep your yogurt maker out of the reach of children to prevent accidents.
- Use Recommended Ingredients: Stick to the types of milk and starter cultures recommended by your machine’s manufacturer for the best results.
“A good yogurt maker isn’t just about convenience; it’s an investment in your health, allowing you to craft dairy delights free from unnecessary additives and tailored to your taste.” – Dr. Emily R. Larson, Food Science & Nutrition Expert
Conclusion
Choosing the best rated yogurt maker can revolutionize your dietary habits, providing a consistent supply of fresh, customizable, and healthy yogurt. Whether you prioritize precision temperature control, large capacity, or a simple, compact design, there’s a perfect model out there for you. By understanding the different types, key features, and proper usage, you’re well-equipped to make an informed decision and embark on your journey to homemade yogurt excellence.
What kind of delicious yogurt will you create first with your new machine?
Frequently Asked Questions
Can I use any kind of milk in a yogurt maker?
Yes, most yogurt makers can accommodate various types of milk, including dairy (whole, skim, goat, sheep milk) and many plant-based milks like soy, almond, or coconut. However, the exact fermentation time and results may vary depending on the fat and protein content of the milk, so some experimentation might be needed for optimal consistency with non-dairy options.
How long does homemade yogurt last?
Homemade yogurt, when stored properly in an airtight container in the refrigerator, typically lasts for about two weeks. It’s always best to consume it within that timeframe and discard it if you notice any off smells, discoloration, or mold growth. For best results when using as a starter for a new batch, use yogurt that is less than a week old.