Craving the creamy, wholesome goodness of homemade yogurt but want to skip the electricity? You’re not alone. Many home cooks and health enthusiasts are discovering the simple joys and numerous benefits of crafting their own fermented dairy without plugging into an outlet. Whether you’re seeking simplicity, portability, or just a more traditional approach, the world of non-electric yogurt makers offers an enticing alternative. Dive in with us as we explore how these ingenious devices, and even some clever DIY methods, can transform your kitchen and elevate your healthy eating habits.
The Non-Electric Yogurt Maker: Your Guide to Homemade Goodness
Embracing a non-electric yogurt maker means tapping into an age-old tradition, leveraging insulation and natural warmth to transform milk into delicious, probiotic-rich yogurt. This method stands in stark contrast to store-bought options, which often contain added sugars, artificial flavors, and preservatives that dilute the health benefits. By making your own, you gain complete control over ingredients, ensuring a pure, additive-free product tailored to your dietary needs and taste preferences. The simplicity, cost-effectiveness, and environmental friendliness of non-electric options make them a compelling choice for anyone looking to enjoy fresh yogurt on their own terms.
What is a Non-Electric Yogurt Maker and Why Choose One?
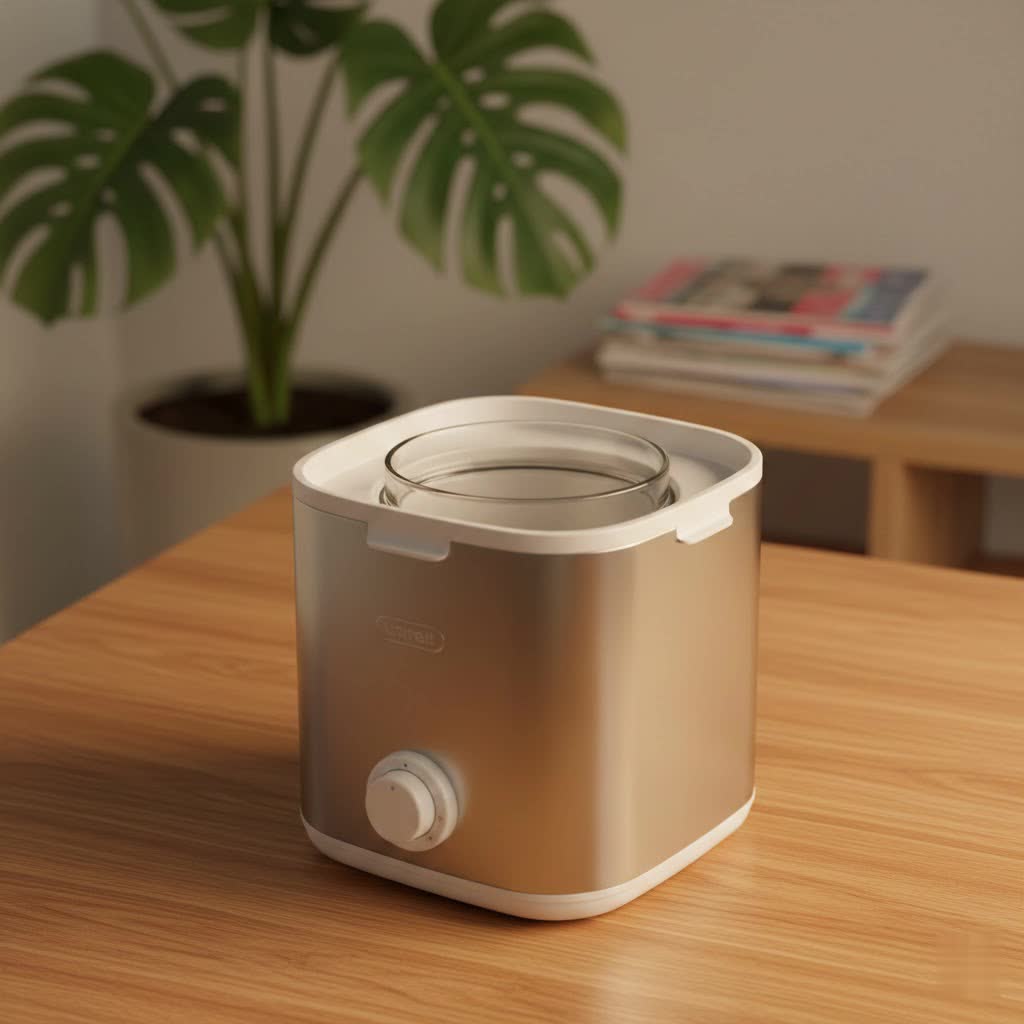
A non-electric yogurt maker is essentially a well-insulated container designed to maintain a consistent warm temperature, crucial for the thermophilic bacteria to ferment milk into yogurt. Unlike their electric counterparts, these devices don’t plug into a power source; instead, they rely on pre-heated milk and an insulated environment to facilitate the fermentation process.
Choosing a non-electric yogurt maker offers several compelling advantages:
- Simplicity: With no complex settings, timers, or digital displays, they are incredibly straightforward to use. You heat your milk, mix in the starter, and let the insulated container do the rest.
- Portability & Off-Grid Living: Their independence from electricity makes them ideal for camping, road trips, or any situation where power access is limited. They’re also a favorite for those embracing an off-grid lifestyle.
- Cost-Effective: Generally, non-electric yogurt makers are more affordable to purchase than electric models, and they incur no ongoing electricity costs.
- Eco-Friendly: By consuming no electricity, they offer a greener way to produce homemade yogurt, reducing your carbon footprint.
- Control Over Ingredients: You decide what goes into your yogurt—choose your milk type, starter culture, and any natural flavorings, avoiding the additives found in many commercial yogurts.
|
Our Picks for the Best Yogurt Maker in 2026
We may earn a commission when you use one of our links to make a purchase.
|
||
| Num | Product | Action |
|---|---|---|
| 1 | Euro Cuisine YM80 Electric Yogurt Maker Machine- Promote Gut Health with Probiotic Rich Homemade Yogurt -Home Yogurt Incubator with Glass Jars, White |

|
| 2 | Yogurt Maker with Adjustable Temperature & 48H Timer - 6 Glass Jars for Homemade Probiotic Yogurt, for Family Wellness & Healthy Diet Lovers |
|
| 3 | 5L Black Garlic Fermenter, Yogurt Maker with Adjustable Temperature & Time Control,Garlics Maker Multi, Clove Garlic Cooker, Kimchi machine,Sweet Rice Wine Maker Full Automatic,Natto Makers |
|
| 4 | GDOR Yogurt Maker with Adjustable Temp & Timer– Probiotic-Rich – Digital Greek Yogurt Machine with 8×6oz BPA-Free Glass Jars, Easy to Use for Home, Stainless Steel |
|
| 5 | Yogurt Maker with Two Containers, Yogurt Maker Machine with Adjustable Temperature & Time Control, Automatic Shut-Off & Constant Temper for Homemade Probiotic Yogurt, Promoting Gut Health |
|
| 6 | Yogurt Maker with Timer and Temperature Control, Fully Automatic for Home Use. Perfect for Making Greek Yogurt and Probiotic Yogurt, Equipped with an Automatic Shut-off Function |
|
| 7 | Yogurt Maker Machine with 3 Functions (Yogurt, Rice Wine & Natto), Adjustable Temperature & Time Control, 1.2L Capacity, Automatic Shut-Off & PTC Heating for Homemade Probiotic & Greek Yogurt |
|
| 8 | Suteck Yogurt Maker - Stainless Steel Yogurt Makers with Adjustable Time & Temp Control,Automatic Shut-Off & Constant Temper for Homemade Greek, Probiotic Yogurt, BPA-Free 2 Yogurt Bowls (2 Quart) |
|
| 9 | Suteck Yogurt Maker - Stainless Steel Yogurt Makers with Adjustable Time & Temp Control,Automatic Shut-Off & Constant Temper for Homemade Greek, Probiotic Yogurt, BPA-Free 8 Glass Jars (48 oz), Black |
|
| 10 | Stainless Steel Yogurt Maker with 1 Quart Glass Jar and Complete Recipe Book to Make 12+ Easy Homemade Dairy Free and Milk Yogurts |
|
The benefits extend beyond the practical. Homemade yogurt often boasts a richer, fresher flavor profile compared to many store-bought varieties, and you can ensure a higher concentration of beneficial live cultures, which are vital for gut health.
Types of Non-Electric Yogurt Makers
Non-electric yogurt making encompasses a range of methods and tools, from dedicated insulated devices to clever household hacks. Understanding the distinctions will help you choose the best approach for your needs.
Insulated Fermenters
These are the most common type of dedicated non-electric yogurt makers. They typically consist of an outer insulated container and an inner container for the milk and starter mixture. You heat the milk, mix in your starter culture, pour it into the inner container, and place it inside the insulated outer shell, often with hot water in between the layers to maintain warmth.
- Pros: They are designed specifically for maintaining the ideal fermentation temperature for several hours without electricity. They are relatively easy to use and often yield consistent results with proper technique. Brands like EasiYo and Yogotherm are popular examples.
- Cons: While consistent, results can still vary depending on initial milk temperature and ambient room temperature. The initial investment is higher than simple DIY methods.
- Best For: Regular yogurt makers who prioritize convenience, consistent results, and portability without needing electricity.
Greek Yogurt Strainers
It’s important to note that Greek yogurt strainers do not make yogurt; rather, they transform plain yogurt (either homemade or store-bought) into Greek yogurt by removing excess whey. These are typically non-electric by nature, consisting of a fine mesh strainer that sits over a container to collect the liquid whey.
- Pros: They produce thick, creamy Greek yogurt from regular yogurt. They are simple to use, require no electricity, and are generally inexpensive.
- Cons: They don’t ferment the milk into yogurt themselves; you need a batch of finished yogurt first.
- Best For: Individuals who primarily enjoy Greek yogurt and want to thicken their existing yogurt batches.
DIY Methods (No Dedicated Maker)
For those who prefer a minimalist approach or want to experiment before investing, several household items can serve as effective non-electric yogurt incubators. The key is insulation and maintaining warmth.
- Oven with the Light On: A conventional oven, turned off but with the internal light bulb on, can provide just enough gentle warmth to incubate yogurt.
- Pros: Utilizes existing kitchen equipment, no extra cost.
- Cons: Requires monitoring to ensure the temperature doesn’t get too high or low.
- Cooler with Hot Water: A picnic cooler can be transformed into an incubator. Place your jar of milk and starter, along with a jar of hot water, inside the cooler and close the lid. Wrap the jars in towels for extra insulation.
- Pros: Excellent insulation, good for larger batches.
- Cons: Requires careful temperature management of the hot water.
- Thermos Flask: A high-quality insulated thermos can keep your milk mixture warm for the fermentation period.
- Pros: Highly portable, very simple, retains heat well.
- Cons: Limited capacity, requires a good quality thermos for best results.
- Insulated Wraps/Towels: Simply wrapping your container of milk and starter in multiple towels or blankets and placing it in a warm, draft-free spot can work in a pinch.
- Pros: Uses readily available items.
- Cons: Least consistent temperature control, higher risk of inconsistent yogurt.
Non-Electric Yogurt Makers: A Comparison Table
| Type | Price Range (USD) | Key Features | Pros | Cons | Best For |
|---|---|---|---|---|---|
| Insulated Fermenter | $20 – $60 | Double-walled, specific inner container | Designed for purpose, consistent warmth | Can be bulky, some require specific starter pouches | Regular users, portability, consistent batches |
| Greek Yogurt Strainer | $15 – $35 | Fine mesh, drip tray, lid | Thicker yogurt, simple, no power | Doesn’t make yogurt, only strains it | Greek yogurt lovers, enhancing texture |
| Thermos Method | $10 – $30 (for thermos) | Excellent insulation | Highly portable, simple, efficient insulation | Limited capacity, careful temperature prep needed | Solo users, travel, small batches, minimalist approach |
| Cooler/Oven Method | $0 – $50 (for cooler) | Uses existing household items | Very budget-friendly, good for larger batches | Temperature can be inconsistent, requires monitoring | Budget-conscious, experimental cooks, larger families |
Top 5 Non-Electric Yogurt Makers & Methods for 2024
While “non-electric yogurt makers” can refer to dedicated units, it also encompasses highly effective traditional methods. Here are our top picks combining dedicated products and reliable DIY solutions.
-
Country Trading Co. Stainless Steel Yogurt Maker (Fermenter)
- This elegant stainless steel unit is celebrated for its robust insulation and durability. It requires no electricity and comes with a recipe book offering diverse yogurt types.
- Pros: High-quality, durable stainless steel, excellent insulation, no programming needed, eco-friendly.
- Cons: Higher initial cost, may require pre-heating the outer container with hot water.
- Ideal for: Those seeking a durable, long-term non-electric solution with consistent results.
-
EasiYo Yogurt Maker (Fermenter)
- EasiYo is a well-known brand offering a simple, insulated system that works with their specific yogurt mixes (though you can adapt it for your own starter). You add boiling water to the outer container and the yogurt mix in the inner jar.
- Pros: Extremely easy to use, compact design, reliable results when following instructions.
- Cons: Often associated with pre-packaged mixes, which some users prefer to avoid for ingredient control. The plastic construction may not appeal to all.
- Ideal for: Beginners, those who value extreme simplicity, and individuals who want a quick, consistent method without fuss.
-
Hatrigo Greek Yogurt Maker / Euro Cuisine Greek Yogurt Maker (Strainer)
- These are not fermenters but excellent non-electric strainers designed to produce thick Greek yogurt. They typically feature a fine mesh filter (often stainless steel) and a container to catch the whey.
- Pros: Creates super thick Greek yogurt, easy to clean, durable stainless steel mesh, versatile for other straining tasks.
- Cons: Doesn’t make the initial yogurt, only strains it.
- Ideal for: Anyone wanting to transform their regular homemade (or store-bought) yogurt into thick, luscious Greek yogurt.
-
The Thermos Method (DIY Fermentation)
- Utilizing a good quality, wide-mouthed vacuum-insulated thermos or food jar is a classic non-electric method.
- Pros: Highly portable, excellent heat retention, very low cost if you already own a thermos.
- Cons: Limited capacity, requires careful pre-heating of the thermos and precise milk temperature.
- Ideal for: Single servings, travelers, students, or those testing the waters of non-electric yogurt making.
-
The Cooler/Oven (Off-Light) Method (DIY Fermentation)
- These resourceful techniques utilize common household items to create an insulated environment for fermentation. A cooler with hot water or an oven with just the pilot light/oven light can maintain warmth.
- Pros: Extremely budget-friendly, utilizes existing kitchen tools, good for larger batches (cooler).
- Cons: Less consistent temperature control, may require more monitoring, can tie up the oven.
- Ideal for: Large families, resourceful home cooks, and those who want to avoid purchasing dedicated appliances.
Choosing the Right Non-Electric Yogurt Maker for You
Selecting the perfect non-electric yogurt maker involves a bit of self-reflection to match your lifestyle and yogurt-making ambitions. Consider these factors:
Determine Your Usage Needs
- Batch Size: Are you making yogurt for yourself, a small family, or a larger household? This will dictate the required capacity.
- Desired Yogurt Type: Do you primarily want plain yogurt, or is Greek yogurt your ultimate goal? This will determine if you need a fermenter, a strainer, or both.
- Portability: Do you need to take your yogurt maker camping, to a cabin, or is it strictly for home use?
- Budget: Non-electric options range from free (DIY with existing items) to around $60 for dedicated units.
Key Criteria to Consider
- Insulation Quality: For fermenters, superior insulation is paramount to maintain the optimal temperature for the entire fermentation cycle.
- Material: Stainless steel offers durability and easy cleaning, while food-grade plastic is lighter and often more affordable. Glass jars are excellent for individual servings and visibility.
- Capacity: Ensure the maker can handle your desired batch size. Some come with multiple small jars, while others have one large container.
- Ease of Cleaning: Look for models with few parts that are dishwasher- safe or easy to hand wash.
- Brand Reputation: While non-electric makers are simpler, choosing a reputable brand can offer peace of mind regarding quality and customer support.
Read Reviews and Compare Prices
Before making a decision, consult online reviews from other users. Pay attention to comments regarding temperature consistency, durability, and ease of use. Compare prices across various retailers to ensure you’re getting the best value.
How to Make Yogurt with a Non-Electric Maker (Step-by-Step Guide)
Making yogurt without electricity generally follows a similar sequence, regardless of your chosen non-electric method.
-
Prepare Your Ingredients:
- Milk: Use whole milk for the creamiest results, though skim or low-fat milk also works. Organic or grass-fed milk can enhance flavor and nutritional value.
- Starter Culture: This is crucial. Use 1-2 tablespoons of plain, unflavored yogurt with live active cultures (check the label!) or a specific yogurt starter powder. Ensure your starter is fresh for best results.
- Optional: A tablespoon of powdered milk can make yogurt thicker; sugar or honey can be added to taste.
-
Sanitize Your Equipment:
- Thoroughly wash and sanitize all containers, spoons, and thermometers that will come into contact with your milk. This prevents unwanted bacterial growth.
-
Heat the Milk:
- Pour your milk into a clean pot and heat it slowly over medium heat to 180°F (82°C). This step pasteurizes the milk (even if it’s already pasteurized, it denatures proteins for a thicker yogurt) and creates a better environment for the starter cultures. Stir occasionally to prevent scorching.
-
Cool the Milk:
- Remove the pot from the heat and allow the milk to cool down to 106-113°F (41-45°C). This is the ideal temperature range for thermophilic yogurt cultures to thrive. Use a food thermometer to monitor precisely. Cooling too quickly can be done in an ice bath.
-
Mix in the Starter:
- Once the milk is in the correct temperature range, take a small amount of the warm milk and whisk it with your yogurt starter until smooth. Then, pour this mixture back into the main pot of milk and stir gently until well combined.
-
Incubate the Yogurt:
- For Insulated Fermenters: Pour the inoculated milk into the inner container of your non-electric yogurt maker. If your model requires hot water in the outer casing, add it according to the manufacturer’s instructions. Seal the maker.
- For Thermos Method: Pour the inoculated milk directly into your pre-warmed thermos.
- For Cooler/Oven Method: Place the milk mixture (in a sealed container or jars) into your prepped cooler (with hot water) or turned-off oven (with light on).
- Let it incubate undisturbed for 6-12 hours. Fermentation time can vary; shorter times yield milder yogurt, while longer times result in tarter, thicker yogurt.
-
Chill and Store:
- After incubation, check for firmness. The yogurt should be set. Transfer the yogurt to the refrigerator and chill for at least 4-6 hours. This stops the fermentation process and further thickens the yogurt.
- Store homemade yogurt in airtight containers in the fridge for up to 1-2 weeks.
Tips for Perfect Non-Electric Homemade Yogurt
Achieving consistently delicious yogurt without electricity can be an art. Here are some expert tips:
- Quality Milk Matters: Start with high-quality, fresh milk. Full-fat milk generally yields the creamiest yogurt.
- Fresh Starter is Key: Always use a fresh starter culture. If using store-bought yogurt, ensure it explicitly states “live active cultures” and check its expiration date. A good quality starter ensures strong fermentation.
- Temperature Control is Paramount: This is the most critical factor for non-electric methods. Invest in a reliable food thermometer to ensure your milk is heated to 180°F (82°C) and cooled precisely to 106-113°F (41-45°C) before adding the starter. Consistent incubation temperature prevents thin or grainy yogurt.
- Don’t Disturb: Avoid shaking or moving the yogurt maker during the incubation period, as this can interfere with the setting process.
- Experiment with Fermentation Time: The ideal incubation time depends on your starter, milk, and desired tartness. Start with 6-8 hours and adjust in subsequent batches.
- Add Flavor After: Mix in fruits, honey, maple syrup, vanilla extract, or other flavorings after the yogurt has chilled. Adding them during fermentation can interfere with the cultures.
> “Precision in temperature is the secret weapon for any yogurt maker, especially when you’re relying on passive insulation. A good thermometer is your best friend.” – Dr. Elara Vance, Food Science Researcher specializing in Fermentation
Common Problems When Making Yogurt and How to Fix Them
Even experienced yogurt makers can encounter issues. Here’s how to troubleshoot common problems:
- Yogurt is Too Thin/Not Setting:
- Cause: Incubation temperature too low, starter not active, or fermentation time too short.
- Fix: Ensure milk cools to the correct temperature before adding starter. Use fresh starter. Extend incubation time in warmer conditions. Consider adding 1-2 tablespoons of powdered milk to your initial milk for added solids and thickness.
- Yogurt is Too Sour:
- Cause: Fermented for too long or incubated at too high a temperature.
- Fix: Reduce incubation time for future batches. Verify your incubation temperature is within the optimal range.
- Yogurt is Watery/Separated (Whey Separation):
- Cause: Over-fermentation, unstable incubation temperature, or sometimes normal whey separation (especially with Greek yogurt).
- Fix: If it’s just a small amount of whey, you can stir it back in. If excessive, reduce fermentation time. If making Greek yogurt, this is expected; strain it further.
- Grainy Texture:
- Cause: Milk was heated too quickly, milk protein was overcooked, or incubation temperature was too high.
- Fix: Heat milk slowly and stir continuously. Ensure milk cools completely before adding the starter.
Care and Maintenance of Your Non-Electric Yogurt Maker
Proper care ensures the longevity and hygiene of your non-electric yogurt maker.
- Clean After Each Use: Wash all components (inner containers, lids, outer casing) with warm soapy water immediately after use to prevent yogurt residue from drying.
- Sanitize Periodically: Regularly sanitize components, especially the inner containers, to prevent bacterial contamination.
- Air Dry Thoroughly: Ensure all parts are completely dry before storing to prevent mildew or odors.
- Store Properly: Store your non-electric yogurt maker in a dry, cool place, away from direct sunlight.
Where to Buy Non-Electric Yogurt Makers
Finding non-electric yogurt makers is relatively easy.
- Online Retailers: Amazon, Etsy, and specialty kitchenware websites offer a wide selection of insulated fermenters and Greek yogurt strainers.
- Specialty Stores: Some health food stores or kitchen supply shops may carry specific brands of non-electric yogurt makers.
- Home Goods Stores: You might find basic Greek yogurt strainers or high-quality thermos flasks at larger home goods retailers.
Important Considerations When Using a Non-Electric Yogurt Maker
While simpler, non-electric yogurt making requires a bit of an artisanal touch.
- Patience is a Virtue: Fermentation takes time. Resist the urge to constantly check or disturb your yogurt during incubation.
- Embrace Experimentation: Don’t be afraid to tweak times, milk types, or starter amounts to find your perfect recipe.
- Understand Your Cultures: Different cultures (thermophilic vs. mesophilic) have different temperature requirements. Most non-electric makers are designed for thermophilic cultures, which need sustained warmth. Mesophilic cultures ferment at room temperature and don’t require an incubator at all.
Conclusion
Embarking on the journey of making yogurt with a non-electric maker opens up a world of fresh, healthy, and customizable dairy goodness. From the robust simplicity of insulated fermenters to the resourceful charm of the thermos method, these tools empower you to take control of your diet and enjoy delicious results without relying on electricity. By understanding the different types, mastering the basic steps, and applying a few key tips, you can consistently produce creamy, probiotic-rich yogurt right in your own home. So, are you ready to simplify your kitchen and savor the taste of truly homemade yogurt?
Câu Hỏi Thường Gặp
Can I make Greek yogurt with a non-electric yogurt maker?
Yes, you can! Many dedicated non-electric yogurt makers are designed for fermentation, after which you can use a separate non-electric Greek yogurt strainer to achieve the thick texture. Alternatively, you can use a non-electric fermenter to make regular yogurt and then strain it through a cheesecloth or coffee filter for a DIY Greek yogurt.
How long does non-electric yogurt making take?
The fermentation process for non-electric yogurt typically takes between 6 to 12 hours, depending on the milk, starter, and desired tartness and thickness. After fermentation, the yogurt needs to chill in the refrigerator for at least 4-6 hours to set further and stop the culturing process.
Is non-electric yogurt making safe?
Yes, making yogurt without electricity is safe as long as you follow proper sanitation procedures and maintain the correct temperature range for fermentation (106-113°F or 41-45°C). Using a reliable food thermometer and ensuring all equipment is clean helps prevent the growth of undesirable bacteria.